Trail Running
Trail Running Training
These exercises will make running uphill and downhill even easier
Do you love running in nature? Do you enjoy trails but what you don’t like is when your thighs are burning on an uphill stretch, or you’re constantly worried about twisting your ankle when you’re going downhill? If that’s the case, we will give you some tips on how you can complement your trail running training with targeted strength exercises. Of course, strength training is only one building block for runners, but it’s one that packs a punch. With targeted exercises, you can master steep climbs more powerfully and quickly. On downhill sections, you can feel more sturdy and confident. Additionally, strength training ensures an improved physical awareness in general, reduces injuries, and helps with faster running times. That means you will be able to enjoy the view from the top and look forward to coming back down! These powerful exercises are the perfect addition to your trail running training.
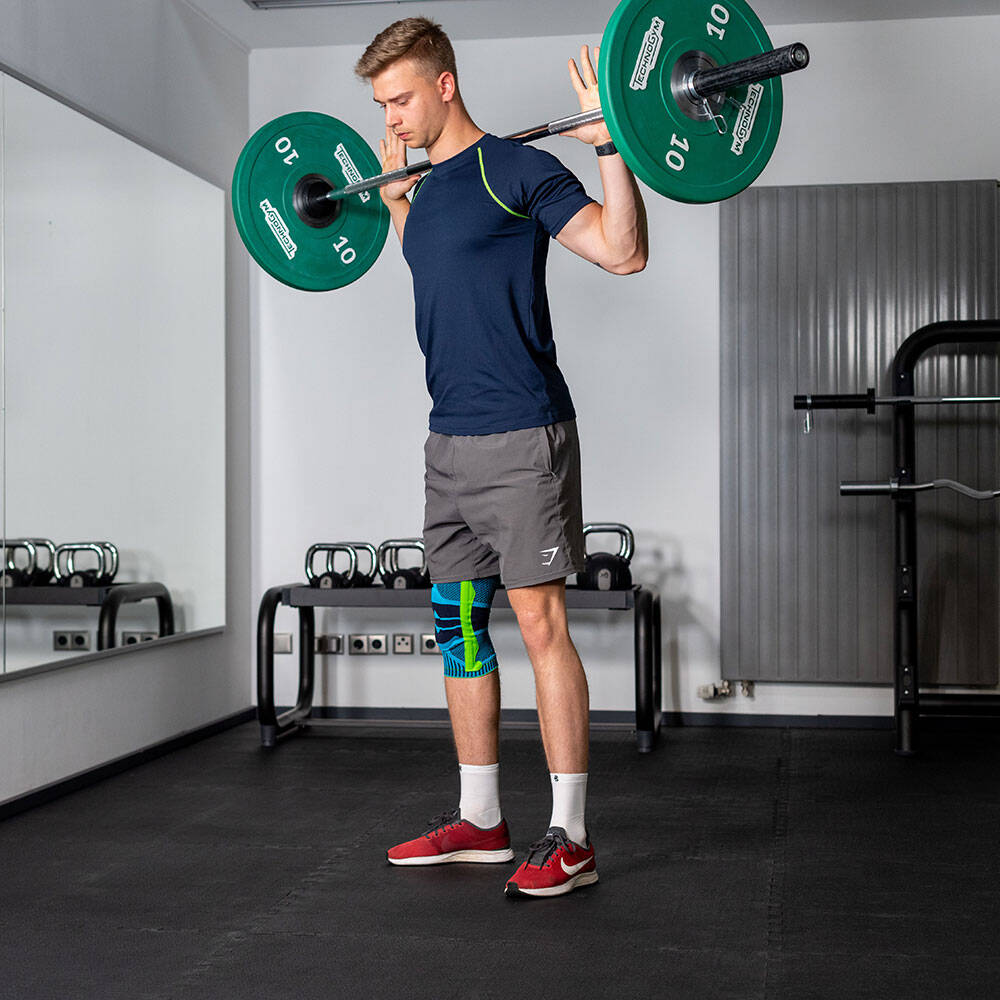
Place a weight bar behind your neck – so it doesn’t rest on your vertebrae. If you pull your shoulder blades together at the back, you can create a nice “cushion” for the bar. It actually rests more on the trapezius. You can also make it a little more comfortable by wrapping a towel around the bar, for example. Stand with your legs shoulder-width apart, toes pointing slightly outward. Slightly rotate your knees outward as well. With your upper body upright, look straight ahead. Hold on to the bar a little beyond your shoulders. Your lower back shows a slight hint of a hollow back.
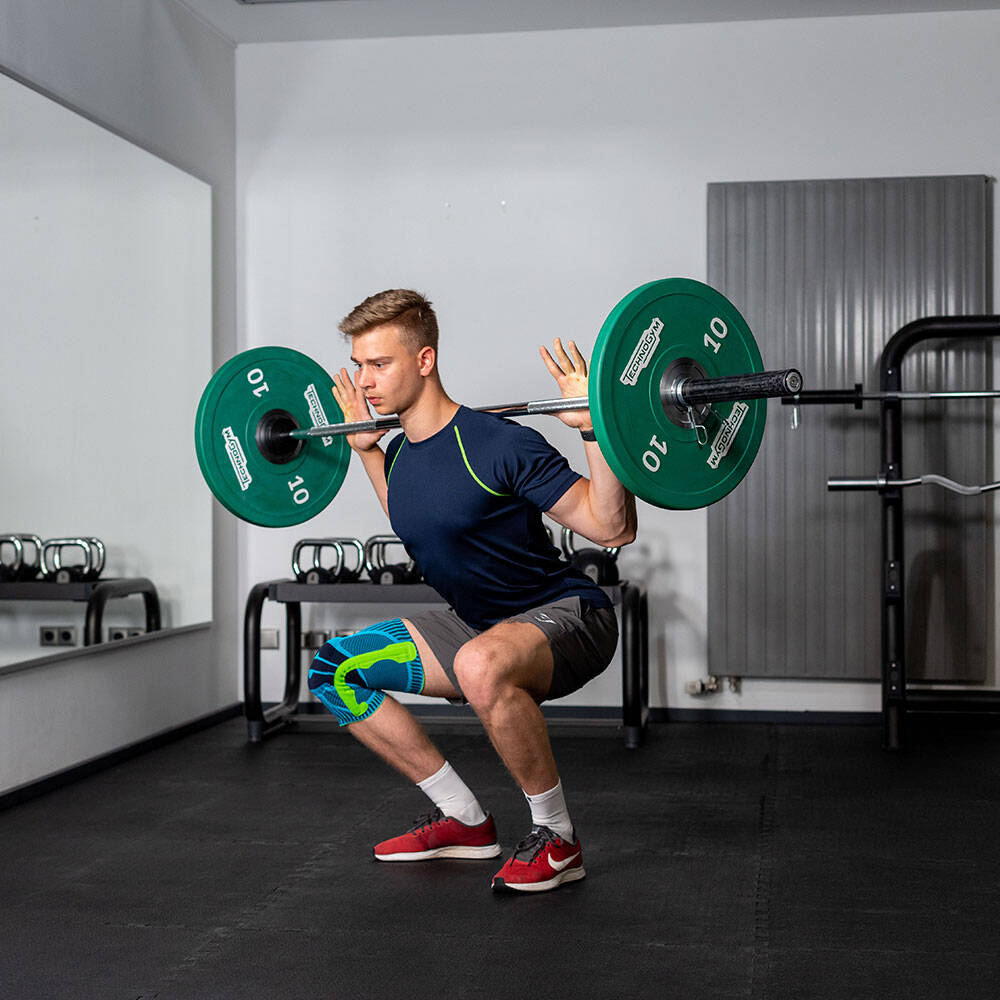
Keeping this stable position, bend your knees and slowly squat down. The general rule is: once the thighs are parallel to the ground, you’ve gone deep enough. It’s really important that your back remains straight and upright in the lowest position as well, and that your knees and feet are slightly turned outward. The load must be distributed evenly across both feet for the whole time. Hold this position for a moment, then push back up. Try to keep the tension in your whole body at all times and keep your back straight.
As with all things: start small! Carefully start with a lower training weight and work your way up. As long as you can keep the repetitions and the execution going, everything is all right and you can try to add a little more – but in small increments. Misplaced ambition is a bad idea here.
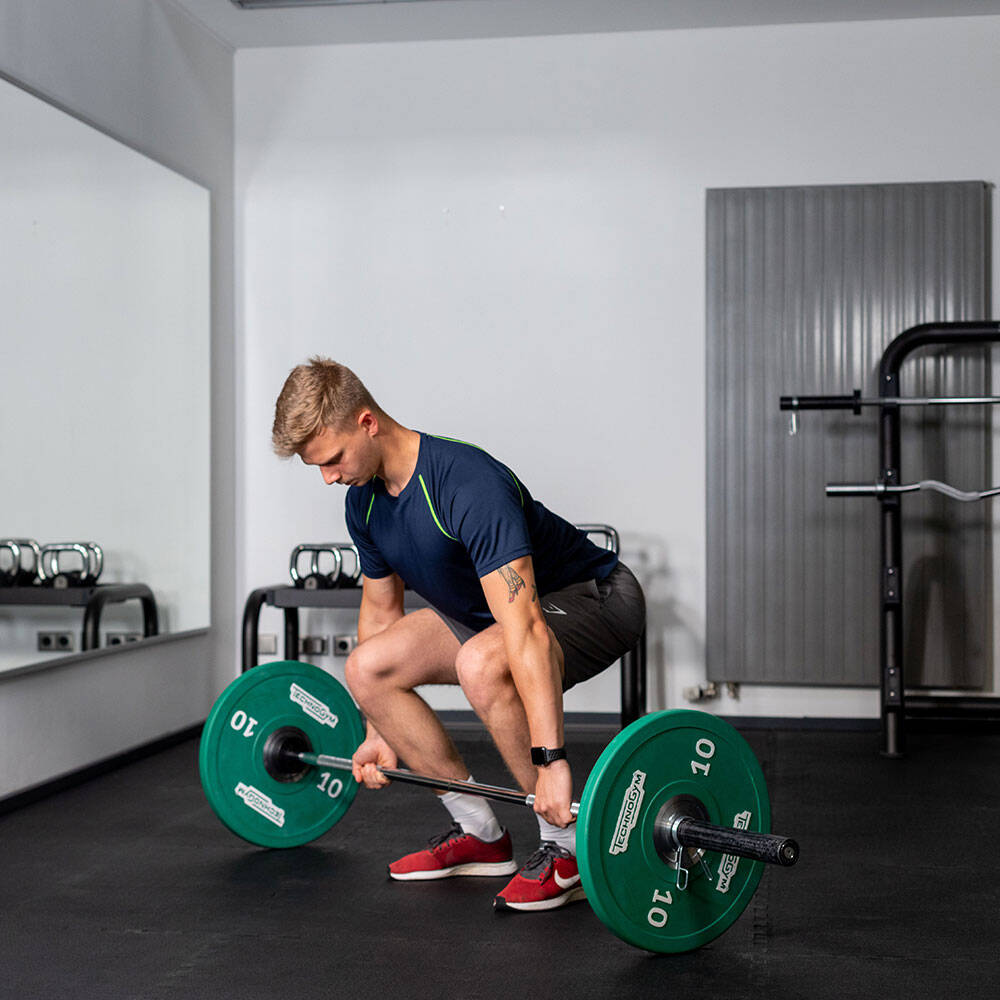
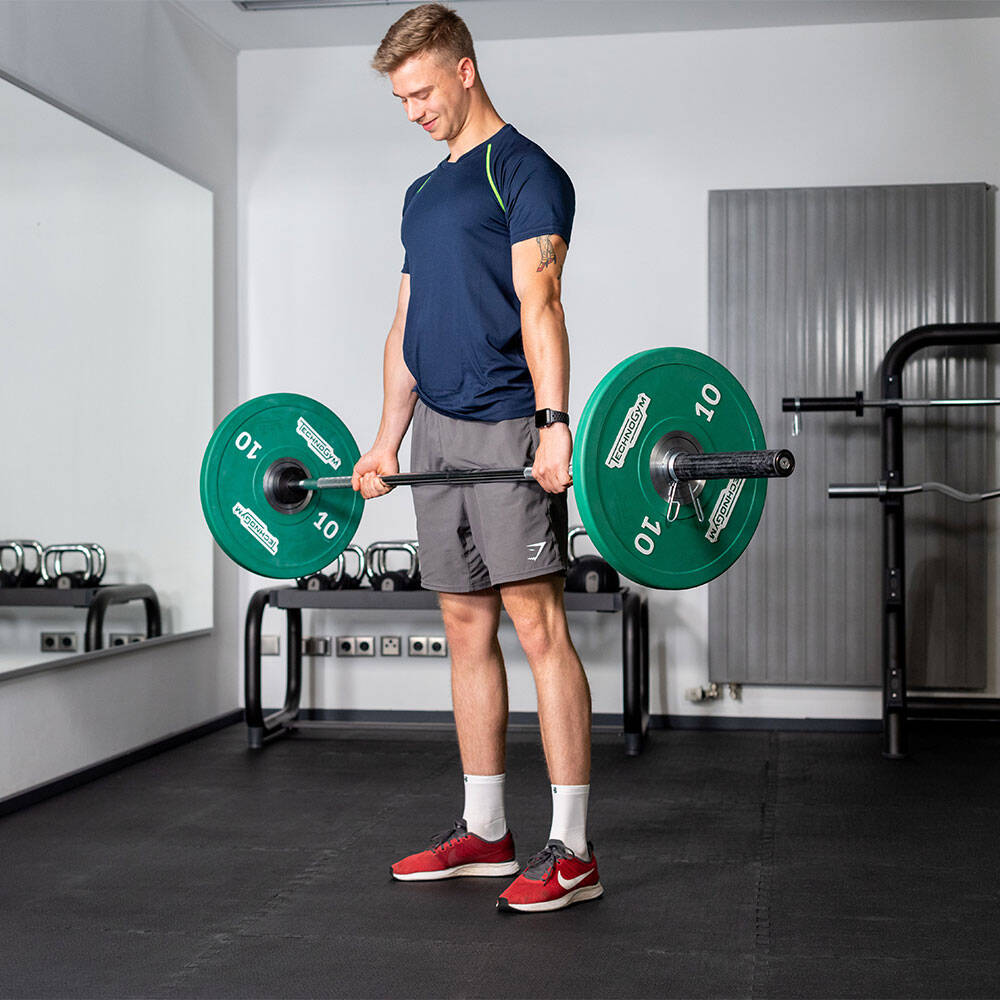
In theory, the idea of deadlifts is quite simple: you pick up the weight. The barbell rests on the ground. Position yourself right in front of the bar, feet about hip-width apart. Ensure your toes are almost parallel, with a slight outward rotation. Grip the bar with your hands at about shoulder-width. You can use the deadlift grip (see picture) which makes holding the bar easier. Squat as low as possible. Keep your back straight. Your head must remain an extension of your spine. Do not push your head back too far. Your spine must remain straight. In this position, look diagonally ahead of you at the ground.
Build up tension in your entire body. Now straighten up with the weight. When you lift up the weight, all your muscles should be activated and work. Ensure that your entire body straightens at the same time. Your legs and back straighten in parallel. Once you’re standing upright, hold the position for a moment, then return to the starting position and put the weight down. In this exercise, too, you should try to slowly increase your training weight. If you’re able to do the exercise correctly and with the specified number of repetitions, you can add a little more weight the next time.
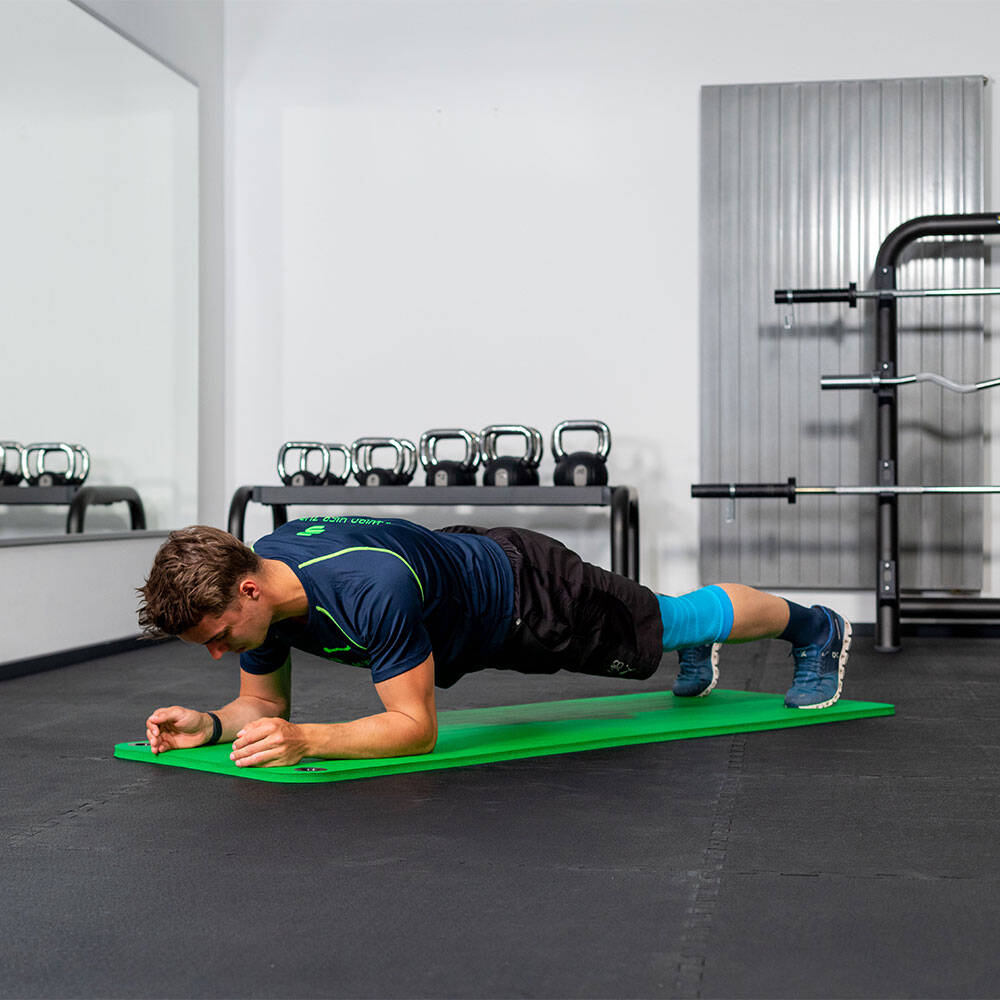
Do this exercise on a mat or towel – a nice lawn will also do the trick, of course. Your forearms are positioned on the ground, parallel and shoulder-width apart, with the elbows right below the shoulders. Your feet are next to each other and rest on your toes. Your body forms a perfectly straight line, from your head right down to your feet, hence the name “plank”. Try not to let your hips sag and don’t lift your buttocks too much. And now: simply keep this position.
Variations
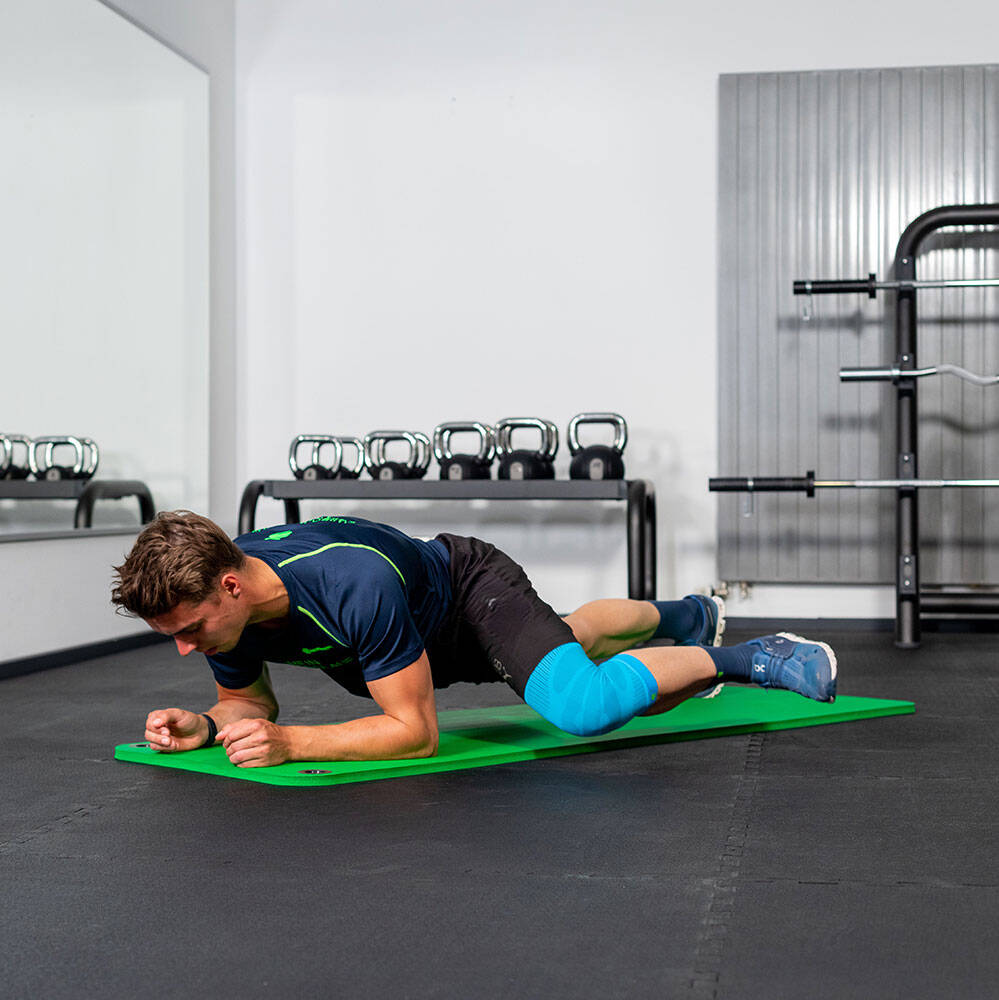
With the plank in particular, there are many great variations. One example is the “spiderman plank”. For this, you’re in the usual plank position. You then alternate pulling your right and your left knee toward the respective elbow. Do not let your torso move, just one leg at a time. The spiderman plank focuses more on the obliques.
3-5 sets of 8-12 repetitions per side
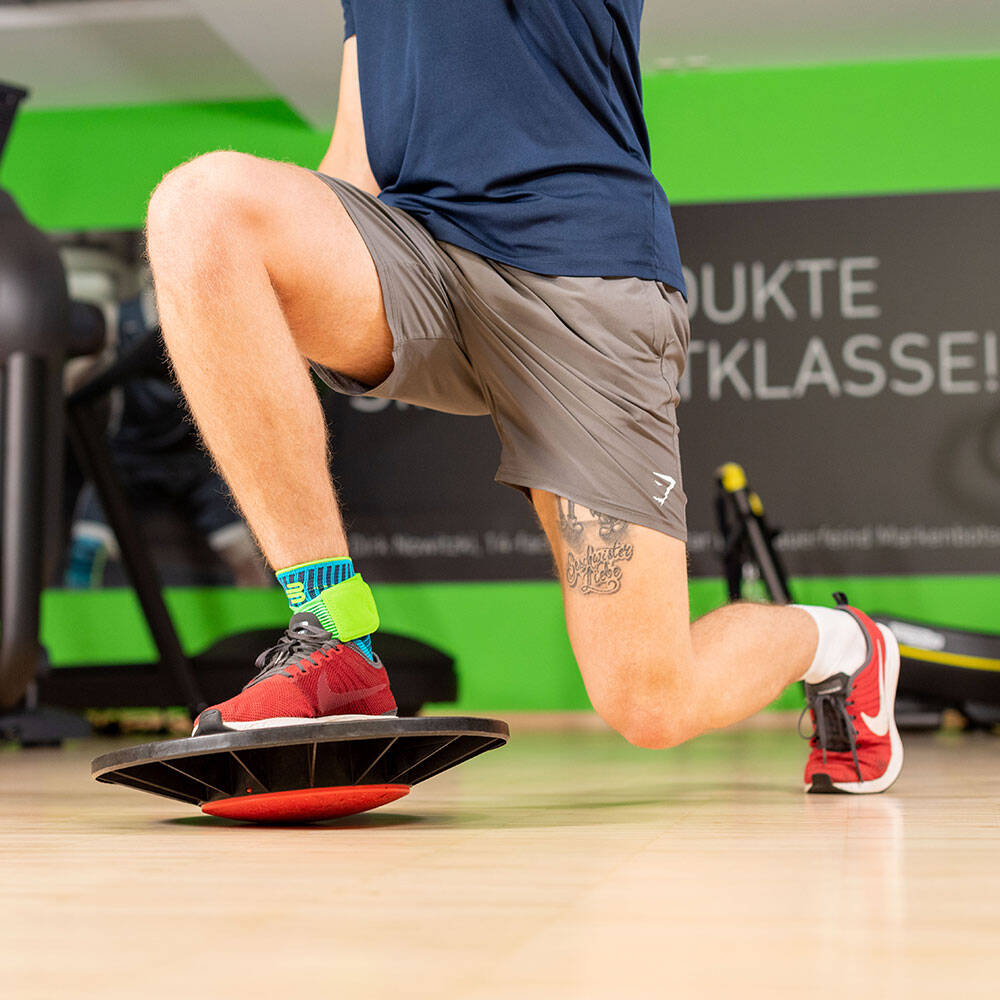
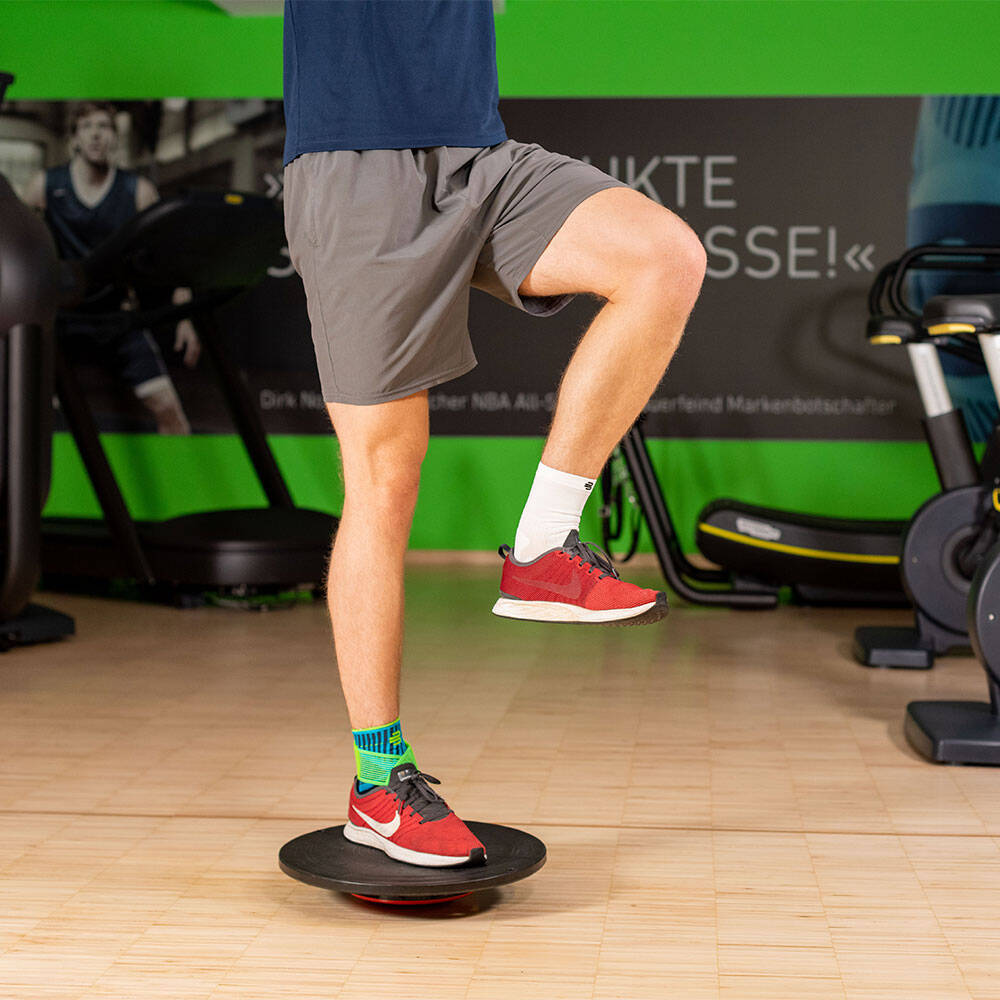
Use a balance pad (any design will do). If in doubt, you can also use a simple foam cushion. Place one foot on the pad, the other one parallel next to it. Take a long lunge back and lower yourself until your knee almost touches the ground. Then hold this position for a moment. When you return, pull the leg you used for the lunge up until your thigh is at a 90° angle from your upper body.
Carry out these exercises in sequence in one of your training sessions. You can either do them as circuit training or do all the sets from one exercise in one go. If you can complete all the exercises twice a week, it will be a good start for your strength training as a trail runner. Gradually increase your training weights and you will soon see how quickly you will be successful. In the beginning, it may happen that a training session still has an impact on you after a day or two - those aching muscles are just a part of it. But soon you’ll see success – you will feel more stable when running on uneven terrain, your posture improves, and you will be able to keep going for longer.
With this training, the feared incline will become your personal strength. Trail running will be pure pleasure and you will be able to enjoy the view from the top even more.

